


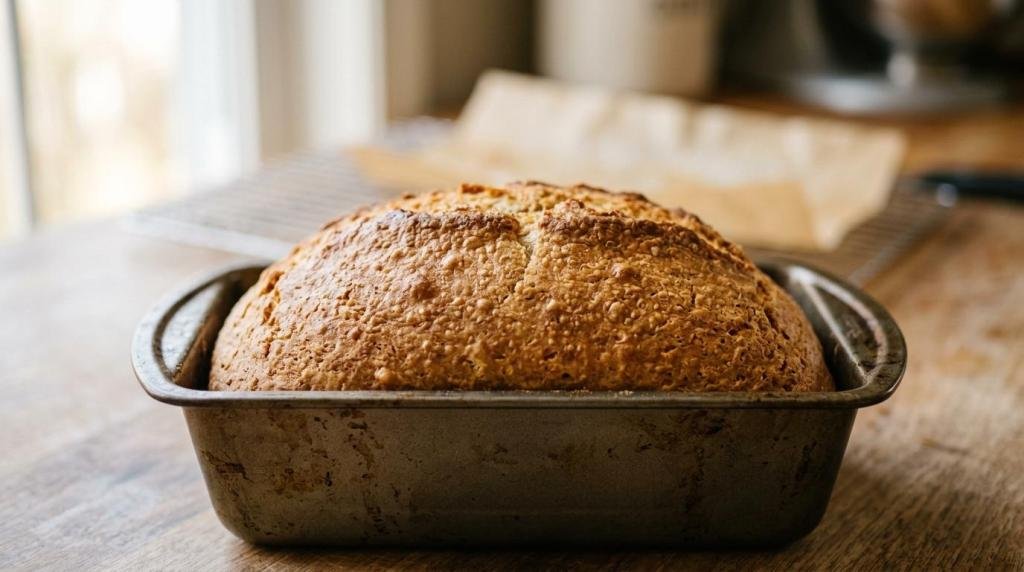
You know that mildly dramatic moment when you slice into homemade bread and it either looks gorgeous or collapses like it just got bad news? Yeah, gluten-free baking can be a little like that. But this gluten free bread recipe yields the calm, reliable friend of the bread world: soft in the middle, nicely golden on top, and actually worthy of toast.
Even better, it’s plant-based, pretty forgiving, and doesn’t require you to summon mystical baking powers. If you can stir, scrape, and wait for dough to puff up, you’re in business.
Why This Homemade Gluten-Free Bread Works
A lot of gluten-free bread has one of two personalities. It’s either dry enough to qualify as packing material, or gummy enough to make you question your life choices. This gluten free bread recipe skips both moods.
The trick is psyllium husk, which helps replace the structure that gluten usually gives bread. You also get a blend of gluten-free flour, a little oat flour for tenderness, yeast for lift, and olive oil to keep things soft. Translation: actual bread texture, not a sad crumbly brick.
It’s also a loaf-pan recipe, which is great news if shaping artisan boules sounds like too much commitment. You mix it, spread it, let it rise, and bake. Very manageable. Very toast-friendly. Very “I made this myself and yes, you should be impressed.”
Ingredients for Homemade Gluten-Free Bread
You do not need a ridiculous list of ingredients or a secret handshake. Just grab the basics below and let the oven do its thing.
- 1 1/2 cups warm water
- 2 tablespoons psyllium husk powder
- 2 tablespoons maple syrup
- 2 tablespoons olive oil
- 1 teaspoon apple cider vinegar
- 2 1/4 teaspoons instant yeast
- 2 cups gluten-free all-purpose flour blend
- 1 cup certified gluten-free oat flour
- 1 teaspoon salt
A few quick notes before you start: use a gluten-free flour blend that already contains xanthan gum if possible. If yours doesn’t, add 1 teaspoon xanthan gum to the dry ingredients. Also, check that your oat flour is certified gluten-free, unless you enjoy accidental plot twists.
Step-by-Step Gluten-Free Bread Instructions
This dough looks more like a thick batter than classic wheat dough, so don’t panic. That’s normal. Gluten-free bread likes to be a little dramatic on the surface while still turning out great.
- Prep your loaf pan and oven. Grease a standard loaf pan and line it with parchment if you want easy removal. Preheat your oven to 375°F. Yes, now. Not halfway through when you suddenly remember ovens need time too.
- Make the psyllium gel. In a medium bowl, whisk the warm water and psyllium husk powder together. Let it sit for 1 to 2 minutes until it thickens into a gel. It looks odd, but odd is doing important work here.
- Add the wet ingredients. Stir the maple syrup, olive oil, and apple cider vinegar into the psyllium mixture. Mix until combined. You’re building moisture and flexibility, which this loaf absolutely appreciates.
- Mix the dry ingredients. In a large bowl, whisk the gluten-free flour blend, oat flour, yeast, and salt. Break up any lumps. A quick whisk now saves you from biting into random pockets of flour later, which is not a charming surprise.
- Combine wet and dry. Pour the wet mixture into the dry ingredients and stir really well. Keep mixing until no dry spots remain and the dough looks thick, sticky, and spreadable. Don’t expect a stretchy wheat dough. That’s not this loaf’s personality.
- Transfer and smooth the dough. Scrape the dough into the loaf pan and smooth the top with a wet spatula or damp fingers. If you want a prettier top, make a shallow line down the center. Purely cosmetic, but hey, we all like a glow-up.
- Let it rise. Set the pan in a warm spot for 30 to 45 minutes, until the dough rises a bit above the rim of the pan. It may not double dramatically, and that’s fine. Gluten-free dough rises with less chaos.
- Bake the bread. Bake for 50 to 60 minutes, until the top is golden brown and the loaf sounds slightly hollow when tapped, completing your delicious gluten free bread recipe. If the top browns too fast, loosely tent it with foil for the last 15 minutes.
- Cool before slicing. Remove the bread from the pan and let it cool completely on a wire rack. Completely means fully, seriously, no “just one little slice.” Cutting too soon can make the inside gummy, and nobody wants that.
Common Gluten-Free Bread Mistakes to Avoid
This gluten free bread recipe is friendly, but bread still likes a little respect. A few small mistakes can turn a great loaf into a weird science project.
- Skipping the psyllium: This is not the moment to get rebellious. It helps hold the loaf together.
- Using cold water: Yeast likes warmth, not an icy bath.
- Adding extra flour too soon: The dough should feel sticky and thick. Dry dough makes dry bread. Shocking, I know.
- Overproofing the loaf: If it rises too long, it can sink in the oven and break your trust.
- Slicing while hot: Patience is annoying, but gummy bread is worse.
If your first loaf looks a little rustic, welcome to homemade bread. Rustic is charming. Rustic with butter is even better.
Alternatives and Ingredient Substitutions for Gluten-Free Bread
Maybe you’re out of one ingredient. Maybe you like tweaking recipes just to see what happens. Respect. Here are the swaps that work best without turning the loaf into a cautionary tale.
| Ingredient | Best substitution | What to expect |
|---|---|---|
| Maple syrup | Sugar or agave | Yeast still gets a little food, flavor stays mild |
| Olive oil | Avocado oil or melted vegan butter | Slight change in richness |
| Oat flour | Sorghum flour or brown rice flour | Texture stays good, flavor shifts a bit |
| Instant yeast | Active dry yeast | Proof it first in the warm water with sweetener |
| Apple cider vinegar | Lemon juice | Similar lift and brightness |
| Psyllium husk powder | Whole psyllium husk | Use a bit more and expect a slightly more textured loaf |
IMO, psyllium is the one ingredient I wouldn’t swap unless you really have to. It does a lot of the heavy lifting, and this loaf knows it.
FAQ About Homemade Gluten-Free Bread
Can I make this gluten-free bread without yeast?
You can, but it becomes a different gluten free bread recipe. More like a quick bread, less like sandwich bread. If your goal is fluffy toast and proper slices, yeast is the move.
Why is my gluten-free bread gummy inside?
Most of the time, one of two things happened: the loaf needed more bake time, or you sliced it before it fully cooled. Annoying answer? Yes. True answer? Also yes.
Can I use only one type of gluten-free flour?
You can try, but results get less predictable. A blend gives you a better balance of softness, structure, and actual bread-like behavior. Single flours tend to go off-script fast.
Do I need xanthan gum if my flour blend already has it?
Nope. If your blend includes xanthan gum, you’re set. Adding more can make the texture too dense, and nobody asked for rubber bread.
How should I store the loaf?
Keep it wrapped at room temperature for up to 2 days, or refrigerate it for a little longer. For the best texture, slice it and freeze the pieces with parchment between them. Then toast straight from frozen like the organized kitchen genius you are.
Can I make this bread without oat flour?
Yes. Sorghum flour is my favorite swap here, and brown rice flour also works. The loaf may be slightly less tender, but still very solid and fully worth making.
Is this good for sandwiches?
Absolutely, once it cools completely. It slices best after resting, and the texture gets even nicer by the next day. So yes, your sandwich plans are safe.
If your kitchen smells like a tiny bakery right now, that’s a win already. Slather a slice with vegan butter, turn it into toast, or stack it into a very respectable sandwich. With this gluten free bread recipe, homemade gluten-free bread can be genuinely good, and now you’ve got a loaf that proves it.


