


Discover the best gluten free pie crust recipe with flaky texture, easy ingredients, and delicious variations perfect for sweet and savory pies.
So, you want a pie crust that skips the gluten but still acts like a proper pie crust. Fair. Nobody wants a sad, crumbly shell that shatters like a cracker the second you look at it too hard.
This one is flaky, buttery, and surprisingly chill to make. It works for sweet pies, savory pies, and those moments when you just need a crust that behaves itself for once.


Why This Gluten-Free Crust Recipe Is So Good
A good pie crust should feel like a little kitchen flex, not a three-hour test of emotional stability. This recipe keeps things simple: cold fat, a solid gluten-free flour blend, and just enough water to bring it together without turning it into paste.
It also has range. Use it for pumpkin pie, apple pie, quiche, pot pie, hand pies, or whatever filling is currently taking over your fridge. The texture stays tender and flaky, which is really the whole point.
Best part? You do not need to be a pastry wizard. If you can stir, press, chill, and roll, you can make this. IMO, that is the kind of kitchen confidence boost we all deserve.
Ingredients You’ll Need
You only need a handful of basics here, and yes, cold ingredients really matter. This is not the moment to freestyle with warm butter and vibes.
- 1 1/4 cups gluten-free all-purpose flour blend
- 1 tablespoon sugar
- 1/2 teaspoon salt
- 1/2 cup cold plant-based butter, cut into cubes
- 4 to 6 tablespoons ice water
- 1 teaspoon apple cider vinegar
- Extra flour blend for rolling
- Parchment paper, because sticking is rude
A quick note on the flour: use a cup-for-cup or all-purpose gluten-free blend that already includes xanthan gum. If yours does not, add about 1/4 teaspoon. That tiny detail saves a lot of future annoyance.

Step-by-Step Instructions for Gluten-Free Pie Crust
This dough comes together fast, so read through the steps first. Then channel your inner calm, competent baker, even if you are absolutely winging it.
Mix the dry ingredients. Add the gluten-free flour blend, sugar, and salt to a mixing bowl. Stir them together so everything is evenly combined.
Cut in the cold butter. Toss in the butter cubes and work them into the flour with a pastry cutter, fork, or your fingertips. Stop when the mixture looks like coarse crumbs with a few pea-sized bits of butter still hanging around.
Add the vinegar and water. Pour in the vinegar, then add ice water one tablespoon at a time. Stir gently after each spoonful until the dough starts to clump when you squeeze it.
Press it together. Dump the dough onto a piece of parchment or a clean counter. Press it into a disk with your hands. Do not knead it like bread unless your goal is chaos.
Chill the dough. Wrap the disk and refrigerate it for at least 30 minutes. This firms up the fat and gives the flour time to hydrate, which makes rolling much easier.
Roll it out. Place the dough between two sheets of parchment paper and roll it into a circle about 1/8 inch thick. If the edges crack a little, patch them with your fingers. Gluten-free dough is dramatic, but manageable.
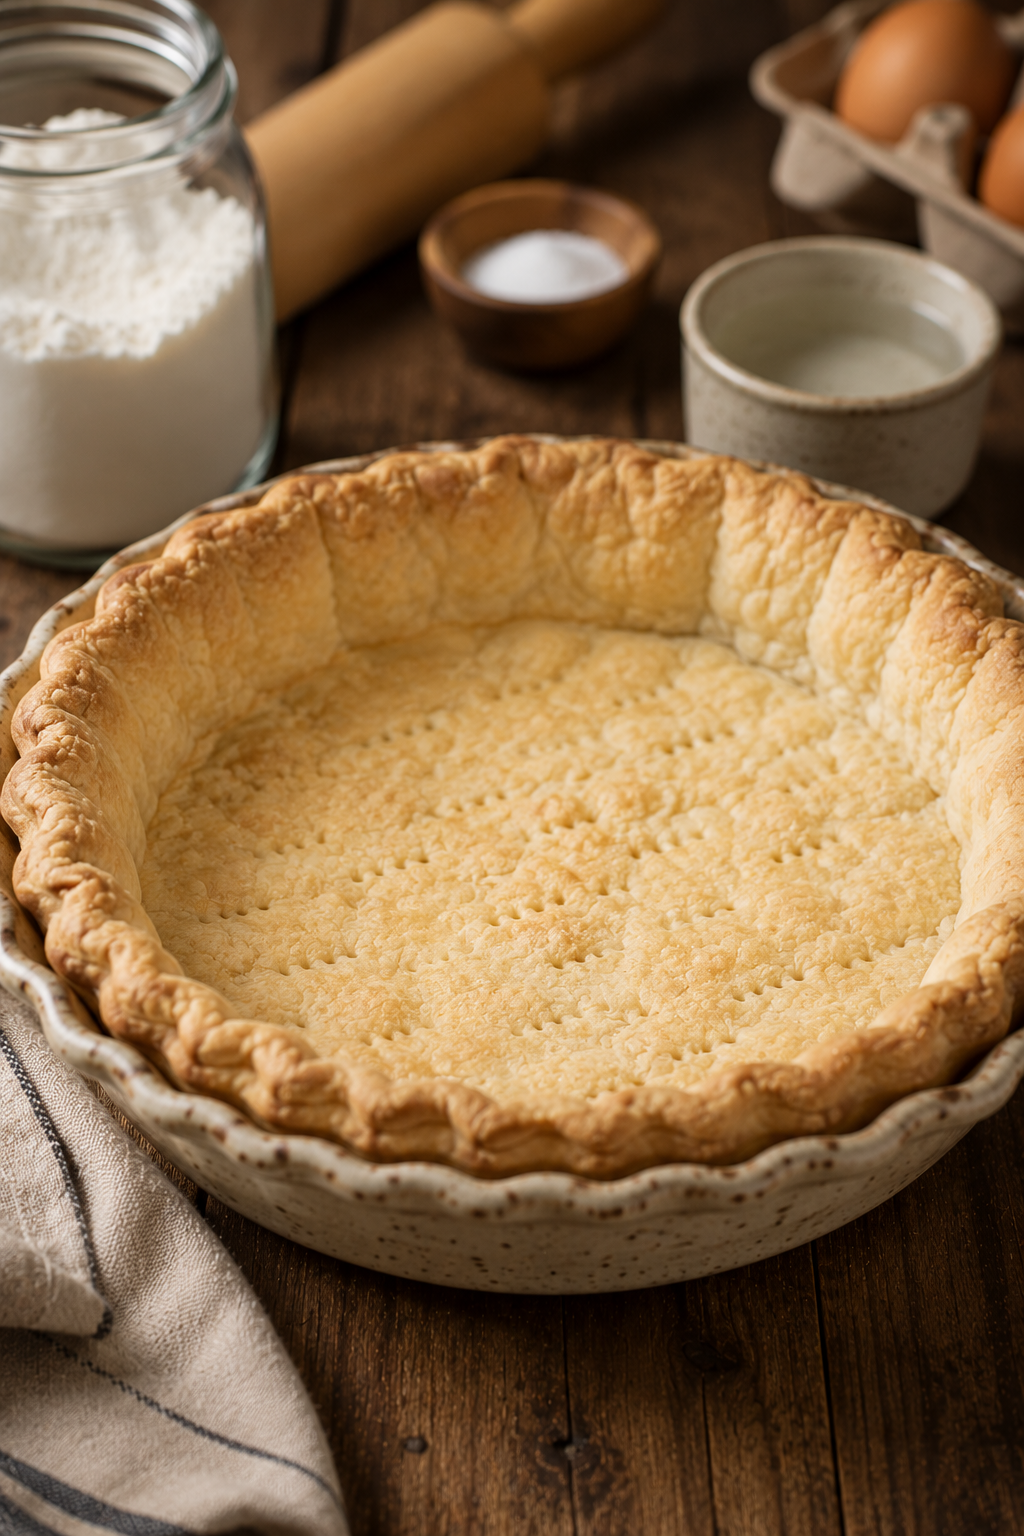
Transfer to the pie pan. Peel off the top parchment sheet, flip the dough into the pan, and remove the second sheet. Gently press it into place and trim the edges. Crimp if you want to feel fancy.
Chill again, then bake or fill. Pop the lined pie pan into the fridge for 10 to 15 minutes. For a blind-baked crust, bake at 375°F with pie weights for 15 minutes, then remove the weights and bake 8 to 10 minutes more. If your filling bakes with the crust, add the filling and follow your pie recipe.
Key tip: if the dough feels soft or sticky at any point, chill it. Cold dough is easier. Warm dough is a little goblin.
Common Mistakes to Avoid With Gluten-Free Pie Dough
Even an easy pie crust has a few traps. Luckily, they are all very fixable, and none of them require a dramatic kitchen speech.
- Using warm butter: Warm fat melts too soon and you lose those flaky layers. Keep it cold, and if your kitchen is hot, chill the bowl too.
- Adding too much water: The dough should hold together, not feel wet. Add water slowly so you do not end up with sticky paste.
- Skipping the chill time: Yes, waiting is boring. No, you should not skip it. Chilling helps the dough roll out without cracking into tiny emotional fragments.
- Rolling without parchment: Gluten-free dough loves to stick when given the chance. Parchment keeps things tidy and saves your patience.
- Using a random flour blend: Not all gluten-free flours behave the same way. A blend made for baking gives you the best shot at a crust that actually feels like pie.
Alternatives and Substitutions for Pie Crust Ingredients
A flexible recipe is a beautiful thing, especially when your pantry is half-stocked and you are determined to bake anyway. Here are the swaps that usually work without turning the dough into a science project.
| Ingredient | Good Swap | What to Expect |
|---|---|---|
| Plant-based butter | Cold coconut oil or dairy butter | Coconut oil gives a slightly firmer texture and a faint coconut note |
| Sugar | Omit it for savory pies | Great for quiche or pot pie |
| Apple cider vinegar | Lemon juice | Similar effect, slightly brighter flavor |
| Gluten-free flour blend with xanthan gum | Blend without xanthan + 1/4 tsp xanthan gum | Helps the dough hold together better |
| Ice water | Very cold milk-free milk | Works in a pinch, though water keeps things simpler |
If you want a richer flavor, use a high-quality plant-based butter with a higher fat content. If you want a more neutral crust for savory fillings, skip the sugar and add a pinch more salt. Easy.
FAQ About Gluten-Free Pie Crust
A few questions pop up every single time with gluten-free baking, and honestly, fair enough. Pie crust can feel a little extra.
Can you make gluten-free pie crust ahead of time?
Yep, and you probably should. Wrap the dough tightly and keep it in the fridge for up to 2 days. You can also freeze it for up to 2 months. Let it thaw in the fridge overnight before rolling.
Why does gluten-free pie crust crack when rolling?
Because gluten-free dough does not have the same stretch as regular dough. It is not broken, it is just less flexible. Roll it between parchment, patch cracks with your fingers, and keep going like a calm, capable person.
Do you have to blind bake this pie crust?
Only when the filling needs less bake time or has a lot of moisture. Custard pies, cream pies, and some fruit pies do better with a partially or fully blind-baked crust. If you are making a pie that bakes for a long time, you can usually skip it.
Can you use coconut oil instead of butter?
Yes, though the texture changes a bit. Use solid, cold coconut oil and work quickly. The crust will still be crisp and tasty, but it may not have quite the same buttery vibe.
What is the best gluten-free flour for pie crust?
A cup-for-cup gluten-free flour blend is the easiest option. Look for one meant for baking, ideally with xanthan gum already included. Single flours like almond or coconut flour are not a straight swap, so do not toss them in and hope for the best.
Can this crust work for savory pies too?
Absolutely. Just leave out the sugar and maybe add a pinch of herbs or black pepper if that sounds good. This crust is just as happy holding roasted veggies and creamy filling as it is holding apples.
How do you keep the bottom crust from getting soggy?
Chill the crust before baking, and blind bake when your filling is extra wet. You can also brush the crust with a little plant milk or egg substitute wash before adding filling. That light barrier helps more than you might think.
How to Use This Pie Crust With Confidence
Once you make this a couple of times, it stops feeling like a “special diet” recipe and starts feeling like just a really solid pie crust. That is the sweet spot. You want something reliable enough for holidays, random Tuesday baking, and those last-minute pie cravings that show up out of nowhere.
So grab your rolling pin, keep the butter cold, and do not panic over a crack or two. Patch it, chill it, bake it, and move on with your glorious pie-making life. A homemade gluten-free crust is very doable, and yes, it tastes way better than the frozen one hiding in the back of the freezer.


